Showing posts with label art. Show all posts

Tuesday, May 6, 2014

Painting on the Wild Side


Yesterday I whipped up a big ol’ bowl of sidewalk chalk paint. I’ve had my eye on this cool paint for a while on Pinterest, but was waiting for some nice spring weather to bust it out…BAM! I love a good activity that both the kiddos can do, is cheap, easy, and simple to clean. Well ladies and gents this is IT!
 

Despite its name, it actually does not require chalk, all you need are 3 simple ingredients that you probably have on hand: cornstarch, water, food coloring.
 

I’ve used these 3 ingredients to make slime during Halloween, it creates a great textural medium that is runny yet solid at the same time. To make the paint you just need to thin it slightly for painting.

Directions:

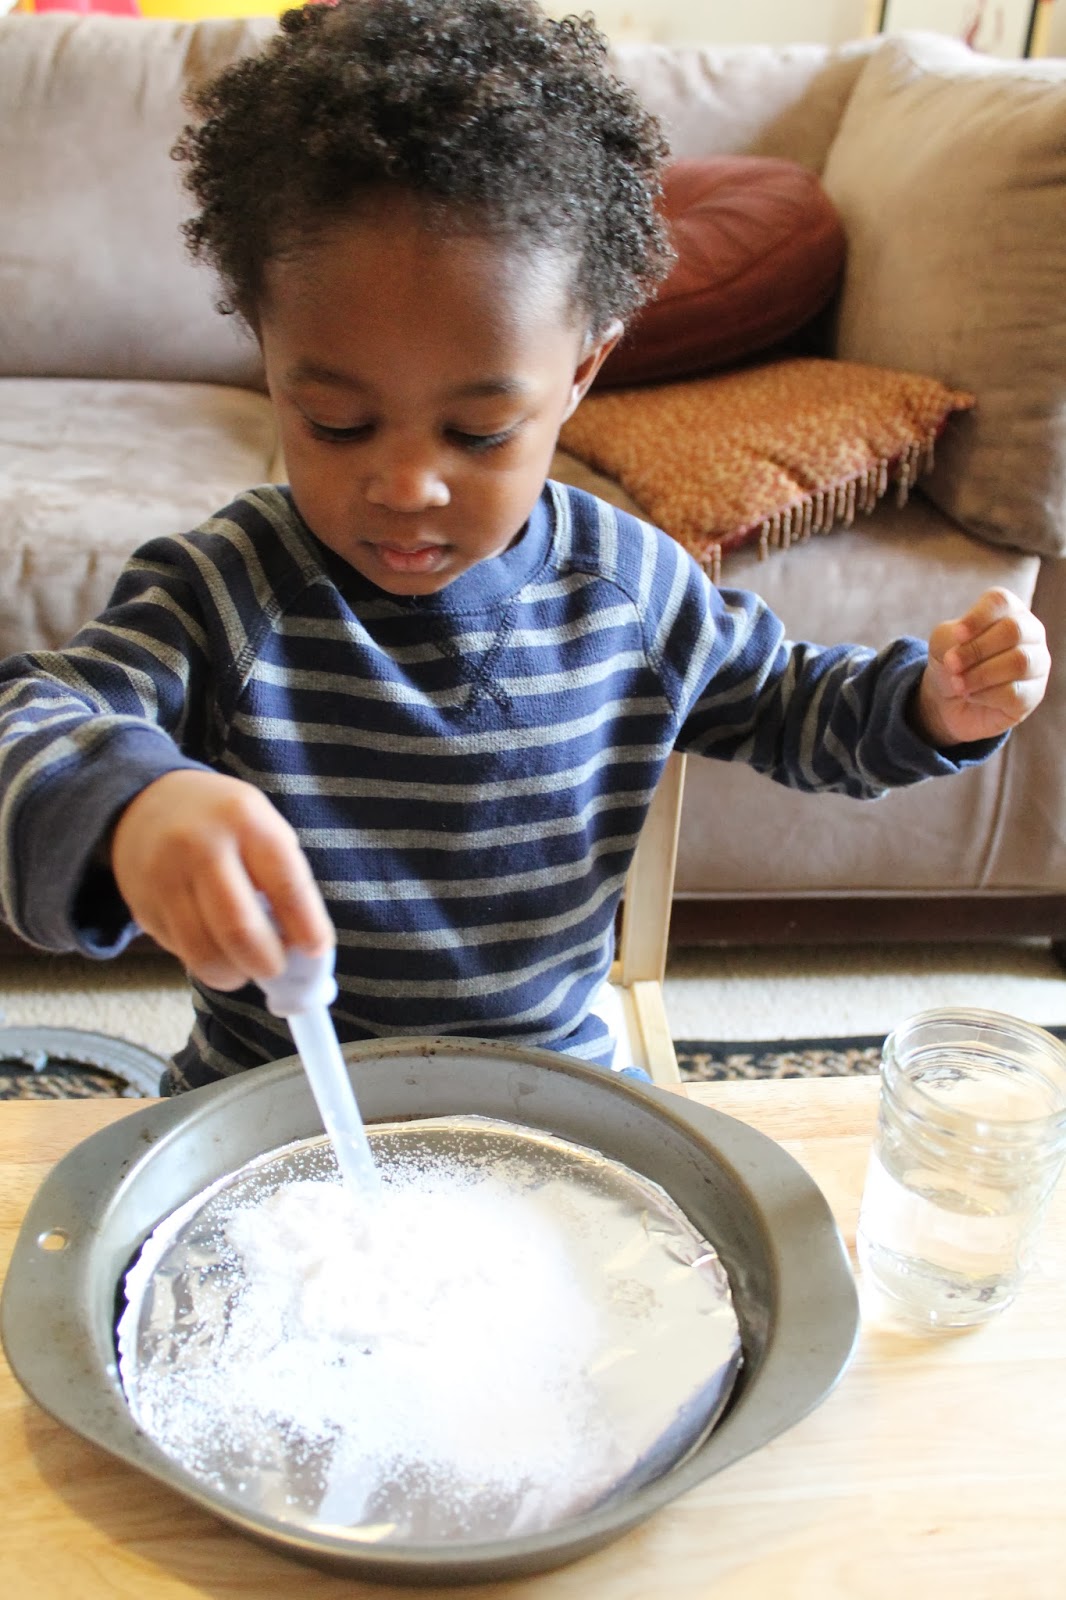
I mixed equal parts cornstarch to equal parts water in a bowl. To fill a 6 cup muffin pan I used ¾ cup each. Whisk together until smooth. If you want a thicker slime like paint just add a spoonful or two of extra cornstarch. It should drip from the whisk yet feel  difficult to stir at the bottom.
 

Next separate out into cups or a muffin tin and add 3-6 drops of food coloring in each section, depending on how rich or pastel you want the color to be.

Last, grab some brushes or sponges and hit the sidewalks or patio.

It is called chalk paint because when it dries, which happens quickly in the sun, it dries to a chalky finish that you can actually peel up and use like chalk. I love that you get 2 sensory experiences in one activity.
 

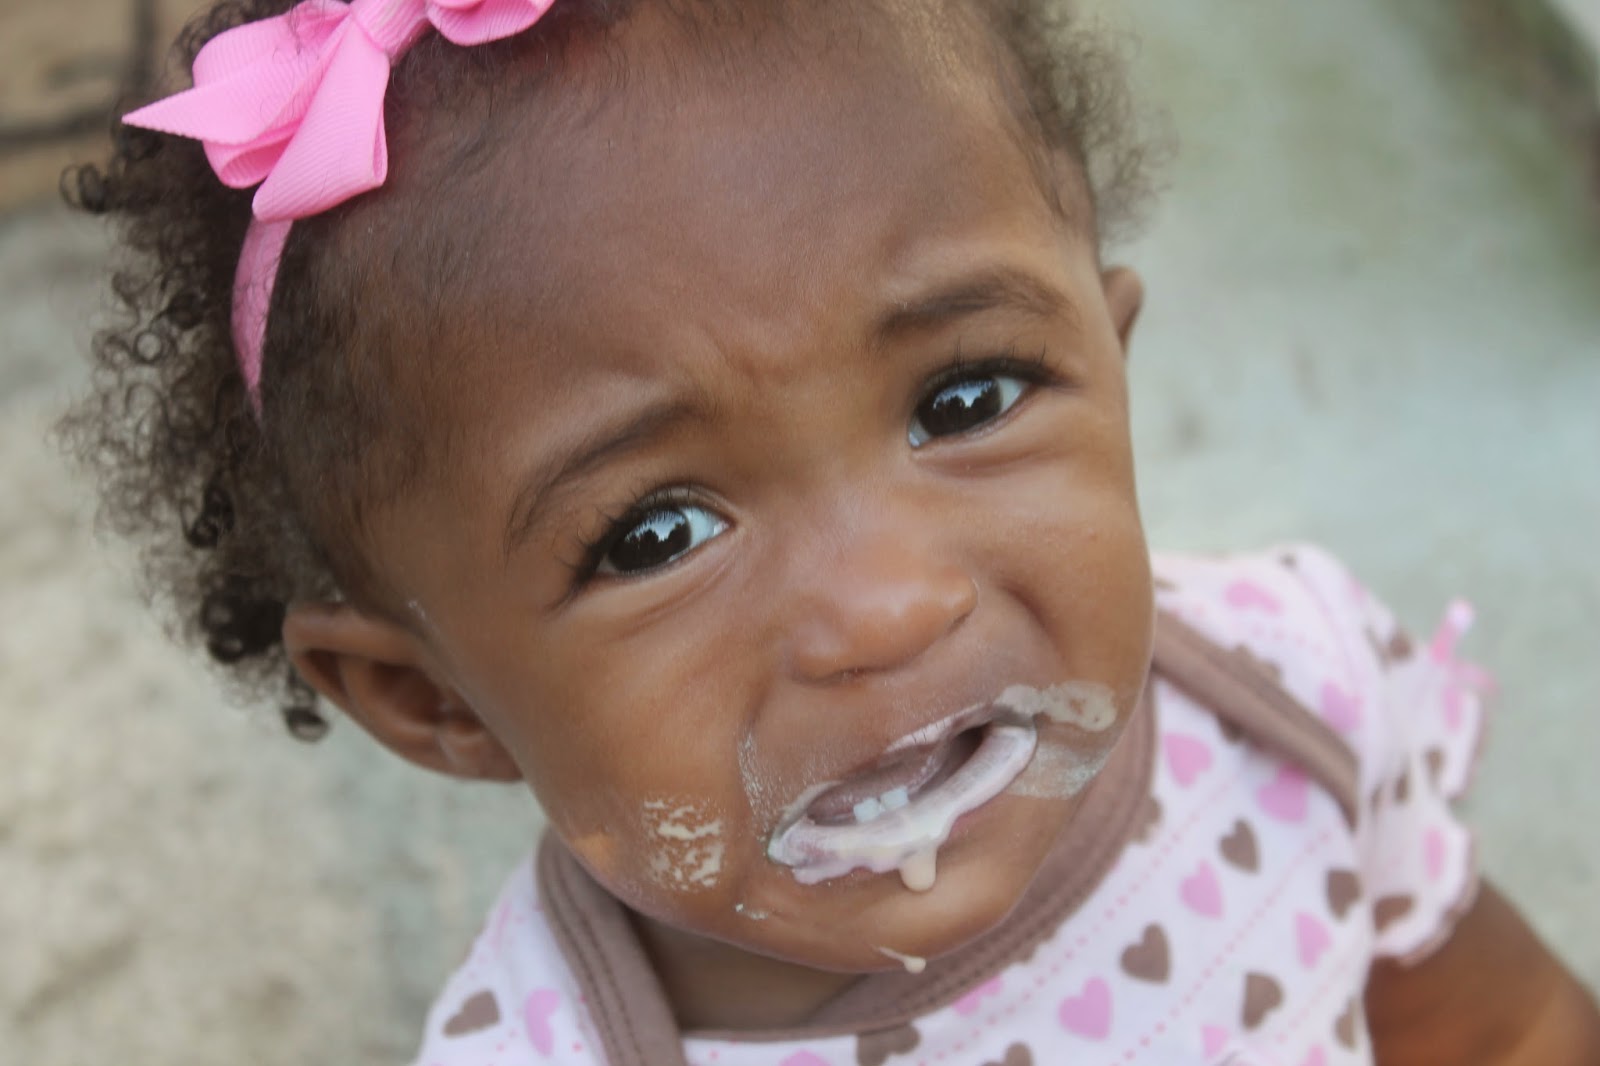
Both kids loved the chalk paint. Although I wouldn’t make it an afternoon snack, it is fairly harmless if your peanut is a taste tester like mine. As you can see, she did not like being told to not eat the paint!
 

Sean mixed his colors and was excited to see it change to brown.

 
Thumbs up all around for sidewalk chalk paint! It easily washes off surfaces, clothes, and skin with soap and water.
 

Sunday, March 2, 2014

Seuss-tastic!


Every year on March 2 (this year the 3rd) schools across America celebrate the famed Dr. Seuss by reading his stories, dressing up as favorite characters, and doing activities galore to celebrate his birthday. When I was teaching, especially 1st grade, I spent the entire week exposing my students to his wonderful works while crafting, playing, and learning along the way. I’m super excited to continue the tradition at home this year with Sean and Olivia! We will share a story a day, or more, with a few activities to extend the fun. Grab yourself a few Seuss classics and join in on the fun.

A few Facts about the Author:

·         His full name is Theodor Seuss Geisel.

·         He took on the pseudonym “Seuss” after being kicked off his college’s magazine for drinking.

·         His first children’s book And to Think That I Saw It on Mulberry Street, was rejected 27 times before it was finally published in 1937.

·         The Cat in the Hat, published in 1957, was written by Seuss in response to a 1954 LIFE magazine article that criticized children's reading levels, Houghton Mifflin and Random House asked him to write a children's primer using 220 vocabulary words.”

·         Before his death in 1991 Dr. Seuss published 60 children’s books.

A few activities we will be doing this week in honor of Dr. Seuss…(Click red links to be directed to activities throughout!)
The Cat in the Hat…the book that sparked the craze!

Sean is working on beginning sounds so he will complete a matching activity sheet created on a word document with a simple table. He will look at the –at word picture and find/match the correct beginning sound.

Hat pattern activity- Use various strips of colored paper to make patterns on the Cat’s Hat.

Thing 1 & 2 Handprint art with Sean and Olivia
 

And to Think that I Saw it on Mulberry St… Perfect since that street is in our neighborhood!

Sean will make and decorate toilet paper roll binoculars and take a walk on Mulberry Street in our neighborhood noting things he sees and practice using descriptive language!
 

Mcelligot’s Pool

Sean and Olivia will make water color paintings of a pool and make fish collages to add to the pool.  For the water color paintings, tape a large sheet of white paper to an easel or wall and dilute some blue tempera paint with water. Provide large brushes to coat the paper. Then provide several fish shaped templates and a ton of random art scraps (construction paper, foil, material, buttons, string, etc.) and collage away!

Sean will play a magnetic fishing game where he will fish for paper fish with paper clips attached, practicing his colors, shapes, and numbers. To make the fishing pole simply attach a magnet to the end of a pencil or stick.
 

Green Eggs and Ham… One of my favorites!

We will of course have a good ol' fashion green eggs (spinach scramble) and ham (bacon) breakfast.

Both kiddos will explore in a Green Eggs and Ham themed bath.

Sean will play a matching game (upper and lower case letter) and a counting game. For the letter match I folded a paper into 8 rectangles and free handed 8 egg shapes then made 8 small green circles. I wrote uppercase letters on the paper and lower case letters on the circles. On the back I repeated the same 8 egg shapes and covered it with contact paper. He will place 8 dollops of green play dough as the yolk and stick a dry spaghetti stick in the center. He will place a magnetic number on each egg and count out and place the correct number of buttons on the spaghetti. This is great practice for counting and fine motor skills.

If I Ran the Zoo

Of course a zoo outing is in order to end the week!

Sean will also play an online animal mix up game!

I’m beyond excited for this week’s Seuss-tastic activities! I hope you grab a few of your favorites and join in on the fun!

HAPPY BIRTHDAY DR. SEUSS!!!!!

Wednesday, February 12, 2014

I Heart You!


Weeeelllll, another week shut in due to the lovely winter weather! This time we have been plagued by ice. No fluffy snow to sled and play in, just cold dreary sleet and ice. Thankfully we had the luxury of power, heat, food, and all of our family under one roof; as many Georgians weren’t as fortunate to have during this storm.

So how to pass the day with a 3 year old, teething 10 month old, and a husband who’s working from home????? Lots, and Lots, and Lots of activities. Since Valentine’s Day is on the horizon I decided to dedicate the day to hearts and crafts for loved ones.

We started the day reading some favorite Valentine’s stories we checked out from the library: The Day it Rained Hearts, The Biggest Valentine Ever, and Happy Valentine’s Day Mouse (If you give a…).


Next Sean was given a handful of conversation hearts in the lid of an egg carton cut in half. On the inside of the holes I colored the bottom the same colors as the candy. I free handed a graph and supplied him with some magnetic numbers. First Sean sorted the colors in the egg carton; next he transferred each pile of colors onto the graph. Then he counted the number of each color from the graph and placed the appropriate number in the egg carton. We talked about which color had the most (longest line) and the least.


I whipped up a bowl of cloud dough. Just mix 2 and half cups of flour with half a cup of oil ( I used baby oil which made the dough soft and lightly scented). You could always add food coloring, glitter, or essential oils. The cloud dough is different from play dough in that it crumbles like dirt but molds together when firmly pressed. It’s a great texture to explore. I added some measuring cups, heart molds, pom poms, and leftover heart candies. Sean spent a long time scooping, sorting, counting, mixing, and stacking. This was a hit. I placed some saran wrap over the top to keep it fresh for tomorrow.


Last we spent hours painting and crafting Valentine cards and prints for our loved ones.

I used contact paper to make heart collages. Cut contact paper into desired shape/size, peel the paper backing off, tape it sticky side up, tear/cut tissue paper (Sean is working on cutting so this was great practice for him), and stick all over the contact paper.


Check out the cute handprint art. I stalk Pinterest for handprint art every holiday and make one for our scrapbook and one for each set of grandparents. They are cute personal ways to remember how tiny your babies are and how fast they grow.


Olivia got in on the craft action by crumpling tissue paper and finger painting. She also had 2 busy baskets today. One was filled with random items: a block, board book, 2 teething rings, balls, and scrap material. The other was filled with musical instruments. She loved pulling out each item, exploring (ie. eating, sucking, chewing, throwing) and placing them back in.

We survived the boredom, kept the noise level down for daddy to work, did a little learning, and had lots of fun. Now off to plan for tomorrow as we will be home yet again! Stay warm!

Monday, January 13, 2014

Snowy Day


Burrrrr! I don’t know about where you live, but it’s sure been cold this past week in Georgia. The temperature dropped to a chilly 5 degrees and I secretly prayed for some nice fluffy snow for my kids to enjoy…but all we got was COLD! So we snuggled up and experienced a snowy day inside the only other way I know- in a book.
 

I remember reading Snowy Day  by Ezra Jack Keats when I was a kid and reading it to my kiddos brought back memories of building snowmen, making snow angels, and making snow cones with my sisters. In this award winning story a little boy named Peter wakes up to a snowy day and experiences all the joys that snow brings. He even tries to keep a snowball memento in his pocket for later. Sean was captivated by the illustrations and intrigued by all the things that you can do with snow. When a child’s interested is peaked from something in a book it is the prime time to extend the story.

Activity #1: Sensory

The first day that we read the story I let Sean experiment with some Grow Snow. Grow Snow is a fine white powder that I purchased in the science section of Hobby Lobby (I have also seen it at teacher supply stores and Michaels craft store), when you add water it expands and swells and takes on the texture of real snow. I added some crushed ice that I blended to make a more “snow” like feel. Sean was in love at first touch. He scooped, squished, and even tried to make a miniature snowman.


Olivia had the chance to play in some crushed ice as well. Since she is still in the “put everything in the mouth” phase I didn’t feel comfortable with her playing in the Grow Snow. She loved the ice, of course she spent most of her time sucking and soothing her gums.
 

Activity #2: Fine Motor

Sean’s been learning to correctly hold and use scissors, so I found making some good old fashioned paper snowflakes to be the perfect activity to compliment the story. Because he is just learning to cut I used thin, white cupcake liners in lieu of regular paper (coffee filters would work too). If you’re unfamiliar with making paper snowflakes, all you do is fold paper several times and cut out shapes on the folded sides…open and reveal a beautiful snowflake.


We talked about how every snowflake design is different and special, and compared the patterns on the 2 he made with the one I made.

Activity #3: Science

In the story, Peter places a snowball in his pocket for later but when he returns to check on it he is disappointed that it’s “gone.” Sean was confused as to where it went so we did a quick experiment. We talked about how heat can melt things. I gave Sean a candle to hold over an ice cube and we watched as the ice cube slowly “turned to water.”
 

Next we put the ice cube in a baggie and placed it in Sean’s pocket, like Peter, and left it there while he completed his last story activity.
 

Of course, after 15 minutes we checked it…and Sean discovered that it was completely “gone” like Peter’s snowball.
 

Activity #4: Felt Board

For the last activity I gave Sean several pieces that I cutout of felt (purchased at Hobby Lobby 4 sheets for a dollar) to create a snowy day scene. I used the easel that he got for Christmas, and just attached a large piece of stiff felt (purchased at Hobby Lobby for less than a dollar) as the background. Since he is in love with trains I also included some pieces to make tracks and trains, as well as parts for a snowman, and trees. This was a big hit with Sean. He has a much smaller felt board and pieces that I made for travel and restaurant use, but he loved having a larger surface to create a bigger scene. I will have another post soon with more ways to use your easel and felt boards so stay tuned.


Make sure to check out the author’s webpage for a read aloud and games: http://www.ezra-jack-keats.org/fun-games/the-snowy-day-read-aloud/

Saturday, January 4, 2014

Color Me Crazy

If you have small children, chances are you have bits of old, broken crayons from party favor bags and restaurants floating around your home, car, diaper bag, and purse. STOP! Do NOT throw those colorful gems away...recycle them into NEW chunky crayons full of colorful swirls that are the perfect size for tiny hands.
This quick "science" experiment, as Sean called it, is FREE, easy, and cute. Truly a throwback, I remember doing them as a Girl Scout. So go dig out those crayon tidbits, preheat your oven to 250 degrees, and get ready for the rainbow magic.

Step 1: Unwrap all the crayons.
 
Step 2: Have your lil assistant help you break the crayons into even smaller pieces.
 
Step 3: Place some cupcake liners into a muffin tin and then add the crayons to the liners. You can go Crazy and mix the colors, have your child sort the by like colors, or use this as an opportunity to mix colors from primary to secondary! You can also opt to use small molds for fun shapes instead of a muffin tin...whatever tickles your fancy!
 
 
Step 4: Place in the oven at 250 degrees for 10-15 minutes until completely melted.
 
 
Step 5: Let them cool completely and remove from liner...then get crazy coloring!
 
 
So simple yet so fun! The sweetness of children is that they find joy in the simple things.
Happy Coloring : )